Showing posts with label Decorating Ideas. Show all posts

Thursday, July 26, 2012

Dresser to TV Stand Tutorial


So...I ran into this beauty at Savers for $15 & decided that even though it was pretty ugly...I could make it pretty...

I sanded her down...
and with a jig saw...cut off the two dividers on the "top shelf" of the dresser. Then I had a piece of wood cut to match the dimension and laid it down to create a smooth open shelf, instead of the 3 top drawers. I also put a piece of beadboard in the back...but this wasn't necessary, as you can't see the back in the finished project. Oops.
I primed the entire dresser and here you can see my wood "shelf" sitting on top...
I applied wood glue and then clamped it for a good 24 hours until I thought it was secure...

I put my freshly painted doors back in & bought some cheap white knobs at Hobby Lobby! Notice that they were the "handle" knobs, but I couldn't find any that I liked, so I just put 2 single knobs in each drawer and I think it turned out great!
Freshly painted light blue "entertainment dresser"...
And my TV is much happier sitting on a pretty piece of furniture! I didn't even notice the curves at the bottom of the dresser until it was painted & I love them. The top shelf provides a perfect spot for our DVD Player and Tivo and a spot for a woven basket in the middle...
Hidden in that basket??
Remotes & tv cords!

and those dresser drawers provide storage for ALL our movies!!!

Remember this???
It's now this...


Friday, June 10, 2011

Bedroom Lamp Redo

These 2 little ladies have been sitting on our nightstands for the past several years & it was time to give them a makeover...
They are BROWN & nothing in our bedroom is brown. 
I thought I was going to buy some new chunky blue or yellow lamps for our room...but lets me honest, 
these 2 lamps are FREE...so for now, they are staying!
I snipped off the jewel thingy-s that hung down. Mostly so I didn't have to spray paint around them.
Then I chose a new color for my lamps...BLUE!
Gave them a quick coat...
and while they dried, I went inside to revamp the shades.
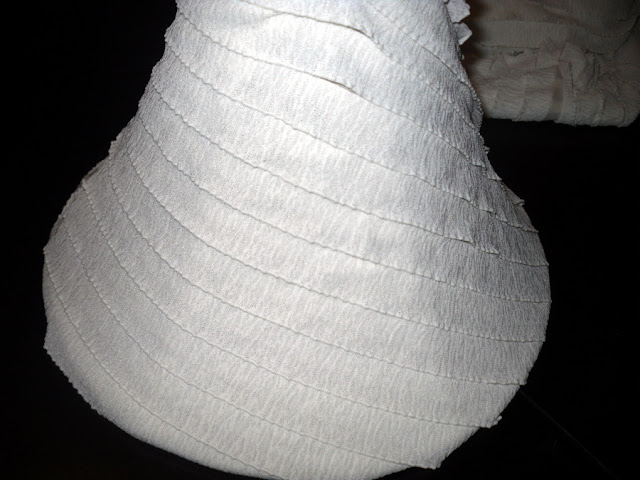
I was going to leave the shades, but remembered I had this pre-ruffled fabric in my stash & thought it might be cute on the shades...
and so I wrapped them, in no particular way, hot gluing along the way!
Put the lamps back together...
oh yah, I sanded down the bases first...
and then put them back in their places...
and they coordinate MUCH BETTER in our bedroom...
so I'm happy! :)

Tuesday, November 9, 2010

Christmas Art

My brother Rob just put up a new wall of CHRISTMAS ART at his Custom Framing Store, Matage!

Don't live in Mesa?
Guess what...he will SHIP it to you!
AND...I promise you won't find this quality ANYWHERE else.

 I'm in love with this one.
I'll be honest, for a second I thought "Why did Rob put a sight chart in with his Christmas Decor?"
Then I read it & it is my favorite!
Check him out on Facebook HERE
or his website HERE

& get some BEAUTIFUL Christmas Art for your home TODAY!!!


Photobucket

Monday, October 25, 2010

GREY

We are making pretty good progress on our
Master Bedroom,
but I haven't had much time to post any pictures.

I decided to paint our Furniture GREY
& I LOVE the way they turned out!

Here are the befores & afters of our Nighstands & Dresser...

*The dresser was my husband's when we got married, I used the same hardware because I liked it...


*My sis-in-law recently asked if I wanted these nightstands for FREE, that she has scored for FREE when a local Home Decor store went out of business...
My answer was YES, of course!


Thursday, October 14, 2010

Love Is All You Need-Tutorial


As I posted HERE, I wanted to make some DIY Art for my bedroom, using this as inspiration...

Well...I decided to take advantage of my son's afternoon nap & decided to see if I could make it with what I had on hand.

I found some scrap wood that was big enough. It wasn't the ideal type of wood I would have picked, I would probably have bought smooth MDF...but in the end I ended up liking the texture this wood brought to the project.
The piece of scrap wood determined the size...

                 I used my NEW JIG SAW(yay) & cut 2 pieces,
                                         each 30" x 14 1/2"

I decided to do my grey & yellow combo in my Master Bedroom...BUT I'm NOT painting the walls grey. I'm too scared that it would be too dreary for me. But I AM painting the furniture grey! I want to bring in greys in other places as well, so I decided this art was a good place to start incorporating it. I painted both pieces of wood grey...

while drying, I went inside & opened up MAKE THE CUT on my computer.
If you have a Cricut & don't have this software...go to my sidebar & click on the link and buy today! You will LOVEEEE it! And I will LOVE you, because I get a percentage of the sale!


I found a simple font(you can use ANY true type font with this software! It literally replaces the need for cartridges!) & then was able to make the letters the exact size I needed them...
I use contact paper to transfer my vinyl & it is really cheap at Walmart...don't buy the expensive "transfer tapes"...this works just as well! I laid them out and then decided to cut out the individual letters in LOVE IS so I could space them across the entire 30"...
Make sure your vinyl is pressed down and sealed to the wood...
and then spray paint your boards!
I almost did it black, like in the original,
but I want to bring a LOT of white into the room & so I decided to go with WHITE...

Once the top coat of paint was dry, I peeled off the vinyl & saw the grey pop through! This is when I decided I liked the cheap/textured wood...I think it adds character, or maybe I'm just trying to justify the crappy wood I used???


               I sanded it a bit on the edges/surface, roughing it up
                                          just a bit & was done!

I actually plan to put them side by side, like this...

on a ledge like this one that Layla and Kevin did over at The Lettered Cottage(even though they recently tore it down & did THIS amazing transformation
...we don't have such amazingness hidden in our walls, so the beadboard ledge it is! ;)


 What do you think of the end result?
Should I redo it on smoother wood?
Should I have done it in colors closer to the original?
Used a different font?


Check out my sidebar for the fun LINKY PARTIES I am joining!!!

Photobucket

Wednesday, October 13, 2010

All You Need is LOVE

I discovered these awhile back through my brother(thanks Matt) & have wanted them above our bed ever since.

BUT, the price tag is more than my budget for the ENTIRE room,

soooooo...

I see a DIY project in the making & I promise you a tutorial soon!


Photobucket

Saturday, August 7, 2010

Kitchen Windows

1 year ago when we moved in, our kitchen looked like this...
Check out the light covers that were 1/2 the size they should be(sweet!)
Now it looks like this.
Besides new counter tops(which are probably not in our budget for awhile), I am happy with it...
except that I've been wanting to make curtains for the windows, to replace the paper accordion blinds that were there when we bought the house.
I scored this green striped fabric last week for $1 per yard at the LA Fashion District & thought it would be some more green into the room. The wall green & the fabric green really don't clash, even though they look like they do in these pictures.
But WHAT kind of curtains should I make?
Keep in mind...the windows go all the way to the ceiling with the trim, so it might limit WHERE I can hang the rod. Also, I want to be able to open and shut the curtains to keep Tom from peeping in at nights!

-------------------------------------

I found these curtains in the Homes And Garden Journal

What do you think of these Half Curtains? 
Half of me loves them
& half of me thinks, where is the other half?


I have ALWAYS loved this style of curtains & my friend(thanks Melis!) sent me this tutorial yesterday from Infarrantly Creative. I think they would be really cute with the green stripes I bought!

I love the idea of just sewing straight lines & attaching the curtains with these clippy things, like found in this tutorial from Make it  & Love it!
I like that it would be REALLY EASY to open & close the windows as I please...
how about these Roman Shades from Palmer Weiss...
They seem like they would be pretty simple to make.

I really like the idea of "doubling up" & maybe putting some pull down shades inside the windows & then curtains over the top, like Urban Grace Interiors did here...

Do you have an easy curtain tutorial you can share with me?
What style would YOU choose if you were me?


Photobucket