It is SPRING BREAK!
Wooohooo!
Since we don't have a fun family vacation we are going on,
I'm trying to be productive this Spring Break &
do some SPRING CLEANING...
part of which includes giving my laundry room a makeover.
Nothing fancy, because lets be real,
nobody sees my laundry room but ME.
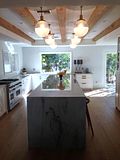
Not that I wouldn't LOVEEEE a Laundry Room like this,
or this...
but realistically I'd rather put my time & money into other rooms in the house. But that is just me.
Oh & the small fact that my laundry room could fit inside the SINK AREA of those laundry rooms;)
I DREAD doing LAUNDRY...it just isn't my thing, but
I'm hoping a little organization will help me in that area!
Today I decided I needed a cute sign on the door & made this up in Picasa...
then I imported it into my MAKE THE CUT program for my Cricut
NEW UPDATE: This program is not compatible with Cricut:( I'm so sad!!!But it is available with the Silhouette, Gazelle and more!
NEW UPDATE: This program is not compatible with Cricut:( I'm so sad!!!But it is available with the Silhouette, Gazelle and more!
(Don't have this program???)
I LOVE IT, use it all of the time & have never had to buy a single cartridge!
I LOVE IT, use it all of the time & have never had to buy a single cartridge!
Anyhow...
I searched in my garage for some wood & came up with this...
1st I painted it BLACK & then I painted it GREEN...
the same color as my kitchen walls.
Then I distressed it a bit with a sander...
I cut my WORDING out in VINYL, but since I wanted a RUSTIC LOOK, I didn't actually want the vinyl on my sign...I just used it as a STENCIL, taking out the actual letters & leaving the remaining vinyl...
My original "sign" was more of square & the scrap of wood I found was a rectangle, so I improvised & moved over the Loads & Loads of Fun & cut a quick circle out just for fun.
(I'm sure you can figure it out, but I painted the CIRCLE 1st, let it dry & then laid everything else down, since I wanted the circle in the background)
and then pulled off the vinyl. Took it outside for one more quick sanding & I was done! I can't wait to hang it up!
After finishing the sign & cleaning out the laundry room today,
tomorrow I hope to find some storage bins for a shelf in my laundry room
& then I'm calling it DONE!
(at least my laundry room now looks good...from the OUTSIDE, with the door shut!)
After finishing the sign & cleaning out the laundry room today,
tomorrow I hope to find some storage bins for a shelf in my laundry room
& then I'm calling it DONE!
(at least my laundry room now looks good...from the OUTSIDE, with the door shut!)


18 comments :
Looks awesome! :)
Very cute. I love how you did the black circle underneath. SO cute!
That is so pretty and it looks wonderful. Found your site through Skip to My Lou. :)
Ooh, loving the distressed look- I've been playing with that myself- the under tone and top layer- good times! So do you use an electric sander or sand by hand to distress the front of your sign? I haven't had the nerve up to try the electric, but it would sure save my hands... The sign looks great :)
Beautiful!
How do you make text "banners" in Picasa. I've only seen options to use text on photos?
craftykat, I used an electric sander...I got one this year for my birthday and it saves SO MUCH time and is super easy to use! The grain in the wood helped in this project, because it gave me the look I wanted.
Marcia,
I actually don't really know what I'm doing in Picasa, but all I did as upload a photo with a white backgroun & then "cropped" it so that it was just the WHITE BACKGROUND & then I added text & exported as a photo. Hope that makes sense! I'm SURE there is an easier way to do this, but I don't know how?! haha
turned out so cute...and if it makes you feel any better...I do have a laundry room...and I don't love doing laundry either, although when it's clean and organized, it's a LITTLE easier. maybe I should get on that. haha!
This is AMAZING!!! LOVE IT!
http://www.craigslistqueen.blogspot.com
I have been looking for a sign just like that for my laundry room! Why haven't I thought to make me own? Thanks for the inspiration! Visit me anytime at http://twogingerprinces.blogspot.com/
I like it. It really turned out great! The laundry room is the last room we will work on. We are slowly trying to work on the new house. ;)
Very nice!
great job and the colour is so nice!
Deborah :)
Love the painting technique you used to make it look worn and loved!
That is SUPER cute. I love it!
I love that saying, if it's ok with you I may steal the "loads of fun"--great tutorial--connie, measuredbytheheart.blogspot.com
I love that saying, if it's ok with you I may steal the "loads of fun"--great tutorial--connie, measuredbytheheart.blogspot.com
I've put together a round up of awesome sign projects on Craft Gossip today and included your post. :) You can see it here
http://homeandgarden.craftgossip.com/6-diy-signs-for-your-decor/
If you would like to share the Craft Gossip love and show your visitors you've been featured, you can grab a button here!
http://homeandgarden.craftgossip.com/grab-a-craft-gossip-button/
Staci and Marcia, if using Picasa and you want a blank page to use for text, you could also save time by just taking a photo of a blank wall, paper, fabric, etc and uploading it. Just a thought. I imagine it would work easier than having to crop an entire photo.
Post a Comment