Showing posts with label Before and After. Show all posts

Thursday, July 26, 2012

Dresser to TV Stand Tutorial


So...I ran into this beauty at Savers for $15 & decided that even though it was pretty ugly...I could make it pretty...

I sanded her down...
and with a jig saw...cut off the two dividers on the "top shelf" of the dresser. Then I had a piece of wood cut to match the dimension and laid it down to create a smooth open shelf, instead of the 3 top drawers. I also put a piece of beadboard in the back...but this wasn't necessary, as you can't see the back in the finished project. Oops.
I primed the entire dresser and here you can see my wood "shelf" sitting on top...
I applied wood glue and then clamped it for a good 24 hours until I thought it was secure...

I put my freshly painted doors back in & bought some cheap white knobs at Hobby Lobby! Notice that they were the "handle" knobs, but I couldn't find any that I liked, so I just put 2 single knobs in each drawer and I think it turned out great!
Freshly painted light blue "entertainment dresser"...
And my TV is much happier sitting on a pretty piece of furniture! I didn't even notice the curves at the bottom of the dresser until it was painted & I love them. The top shelf provides a perfect spot for our DVD Player and Tivo and a spot for a woven basket in the middle...
Hidden in that basket??
Remotes & tv cords!

and those dresser drawers provide storage for ALL our movies!!!

Remember this???
It's now this...


Sunday, May 20, 2012

Happy new chair

This was honestly one of the quickest makeovers I have ever done! I bought this chair...actually 2 matching chairs at a garage sale last week for $10. I grabbed 1/2 yard of some fun fabric when grocery shopping at Walmart one day last week on a whim. I believe that cost me $2. Since I am the only girl in my household, I knew I wanted to incorporate PINK somewhere in my craft room...because, well just because it makes me happy! So when I saw this fabric, I had to have some:) Then...because I have 3 young boys and shopping with them is a nightmare, I sent my hubby to Lowes to buy a can of spray paint...$3 I sent him with a piece of the fabric and told him I wanted a blue that matched and {hoped} he would pick a good color and as it turns out, it was exactly what I had in mind!! I quickly staple gunned my new fabric on and gave the chair a coat of primer, followed by a coat of blue and tada...my new chair for around $10! I love that I finally have a chair at my desk and not only does it make me smile...it's also super comfy!

Tuesday, September 27, 2011

My Dresser TV Stand

A couple of weeks ago, I was looking for Halloween Costumes with my boys at Savers & I glanced over and saw this dresser & the price tag read $14.99!!!

I mentioned it to my husband later that night and said even though it wasn't exactly what I've been looking for(I've been searching for a dresser to use as an entertainment stand), we could probably paint it and resell it if nothing else. Two minutes later he was walking out the door to go and buy it for me. He's the best!!:)

AND...
I made it work for our TV after all & I love it!!

Here she is...all $14.99 of her, holding our TV...

 Here is our Family Room about a month ago, with our laminate tv stand...
Since then, I've tried to brighten it up a bit & add in some BLUES & GREENS & take away the REDS & here it is today:)
  The best part about my new "entertainment dresser"???
All of the storage! I moved all of our movies from our office closet into the 4 larger drawers!
The smaller drawers hold our wii and more cords...all tucked away so nobody can see:)
 and I found a cute little basket to hide our remotes...

All those hidden movies/games/remotes makes me smile:)
The littlest things make me happy! 

** I will show a little "how to turn a dresser into a TV stand soon & you will see how EASY IT IS! You don't believe me? I did this ALL BY MYSELF, without my hubby's help...from start to finish! 

No help from my handy man=it must have been easy!!!:)


Friday, September 9, 2011

Kitchen Curtains

Here is our kitchen exactly 2 years ago, when we bought our home...
Since we bought our home, we painted the kitchen walls green & we painted the trim and cabinets white, which brings us to what our kitchen has looked like for the past year 1/2 or so...
These PAPER blinds have been sitting in the windows, waiting to be taken down for a couple of years, but without much of a budget, they haven't been touched...
ENTER...green striped fabric I picked up a year ago when we went to the LA Fashion District for $1 per yard...
Simplest sewing project I've ever done...I cut RECTANGLES out of the fabric, hemmed the edges & attached with CLIPS...
(lighting is terrible in these pics...sorry!)
It made kind of an "accordian style" curtain(I ironed the creases, to look that way)...
so when I pull them open each morning...they are tucked away nice & neat...
They aren't very fancy & I will possibly want something different in the future...but for $4 in fabric, I am very happy! :)
Next up...
new countertops!!!
someday...when we can afford them

Monday, August 22, 2011

sign redo

WORKING TO BRIGHTEN UP MY LIFE...and I "LOVE IT"!!!
This sign has been hanging above our TV in our family room, since we moved in 2 years ago...
 I'm trying to BRIGHTEN UP this room a bit & take out the red & add greens & blues, so I gave my "Live, Laugh, Love" sign a makeover with a quick coat of spray paint, some green craft paint & a new vinyl saying, that was a little more personalized for our fam...
PS. I have a secret!
I was OUT of white vinyl, but had an entire roll of WHITE CONTACT PAPER & decided to see if I could cut it with my cricut & if it would transfer properly???


It worked PERFECT & is muchhhhh cheaper than vinyl!
***Blade at 3, Pressure & Speed at Low

I think I will be using it more often. I don't know about durability? But I think contact paper is pretty durable, so I don't see it being a problem...especially since this sign is hanging INDOORS.
Has anyone used contact paper before as "vinyl"???
Is this a common thing already going on, that I just didn't know about??

PSS.
Just googled "patterned contact paper" for fun and check out THIS cute find for only $6.57 for 8 yards at Amazon! Oh & THIS one! I can't wait to search around some more & experiment with it!!!


Am I the last to know about patterned contact paper & the ability to cut it like vinyl? Or is this news to you too!?!

Friday, June 10, 2011

Bedroom Lamp Redo

These 2 little ladies have been sitting on our nightstands for the past several years & it was time to give them a makeover...
They are BROWN & nothing in our bedroom is brown. 
I thought I was going to buy some new chunky blue or yellow lamps for our room...but lets me honest, 
these 2 lamps are FREE...so for now, they are staying!
I snipped off the jewel thingy-s that hung down. Mostly so I didn't have to spray paint around them.
Then I chose a new color for my lamps...BLUE!
Gave them a quick coat...
and while they dried, I went inside to revamp the shades.
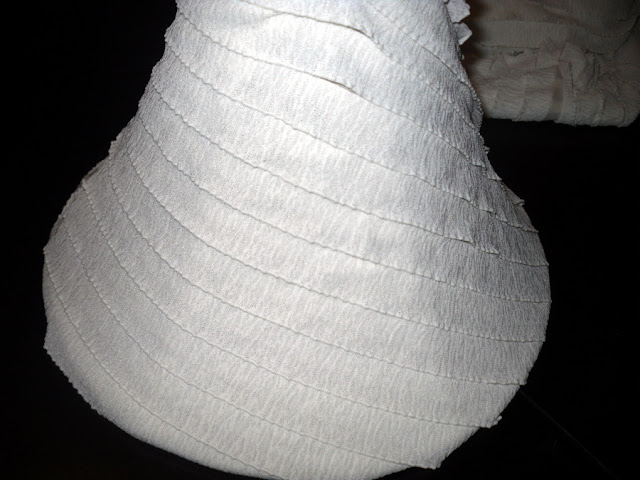
I was going to leave the shades, but remembered I had this pre-ruffled fabric in my stash & thought it might be cute on the shades...
and so I wrapped them, in no particular way, hot gluing along the way!
Put the lamps back together...
oh yah, I sanded down the bases first...
and then put them back in their places...
and they coordinate MUCH BETTER in our bedroom...
so I'm happy! :)

Sunday, April 17, 2011

Shabby Chic Pink

I started blogging about the Bathroom Makeover that my brother & I did for our mom HERE
& I FINALLY got over there to take a few more pictures to show you a little more!!!
---------
We decided to go from TAN walls to PINK!!!
The cabinets look SO MUCH BETTER WHITE!!!
My brother Matt is a painter & is AMAZING!
I wish I had a before of her countertop, but it was sort of beige & had the piece that went around the back of the toilet & looks so much better solid WHITE!

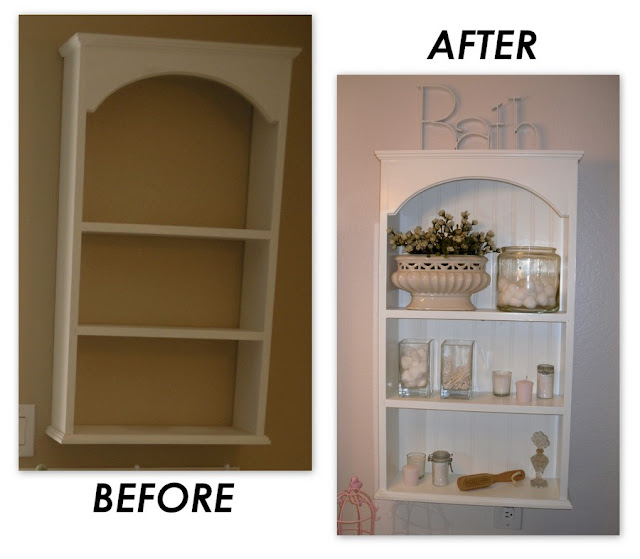
She had this cute shelf on her wall already, but we moved it to a different wall & I added beadboard to the back of it & spruced it up with some accessories...

She had this cute BATH bin already & I added some white washcloths & flowers & placed it on the back of the toilet...
Pretty white flowers in a ceramic pitcher always make for a smile!
Some more cute accessories to liven things up!
Another brother, just as talented...framed the beautiful mirror for the wall & hung it & it looks PERFECT! It looks a million times better than the wall to wall builder's mirror that was there!

I LOVE the way it turned out!
hopefully my parents do too;)...since they didn't have much say!

 Oh! And she has plans to tile the floor in a WHITE tile & I found these cute Shabby Chic PINK rugs @ Target that look so CUTE(but I forgot to take a pic)

Tuesday, March 22, 2011

My "NEW-ish" Front Door

I was reading on my friend's blog---Randum Fancy this week & saw this post about changing her Purple Door. 

It was just the kick in the pants I needed(THANK YOU LeDawn!) & I went to the garage to see if I could find some paint to makeover MY FRONT DOOR...I literally got up from reading her post & went and put on my paint clothes! That is what I love about creative blogs...they really inspire!

 I cleaned my door really well & have been planning on painting it white or red since we moved in, but I was worried white might get really dirty with little neighborhood kids hands knocking on it all day & I didn't have any red on hand...so BLACK was decided on! (Why are all of my decisions based on what I have around the house when there is a Lowe's & Home Depot within 2 minutes of my house?)

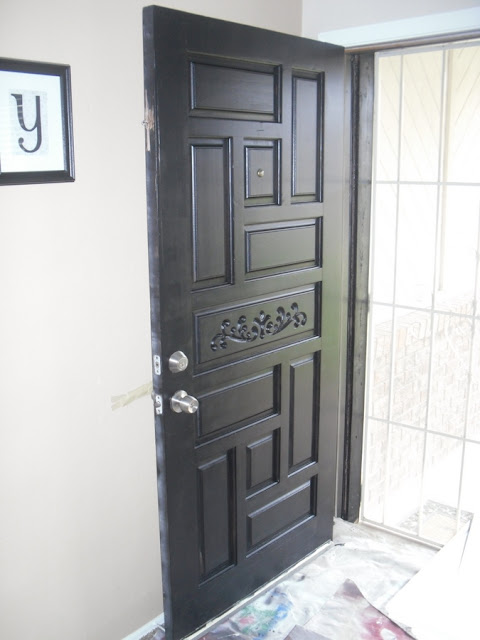
I laid a drop cloth down & decided to skip the sanding & priming...which I would NEVER TYPICALLY RECOMMEND! My front door happens to be completely dry wood with no stain, varnish,etc.  which is the ONLY REASON you can ever skip those crucial steps!

The weather was beautiful, so it was a perfect day to sit & paint, while my kids drew ALL OVER THE SIDEWALK with chalk!

Oh...and of course they helped too! ;)
I can't believe I have been letting people come up to THIS FRONT DOOR for the past year & a half!
After the 1st coat...Okay, this is where PRIMING might have helped! This door SUCKED up my paint & I had to use SEVERAL coats!
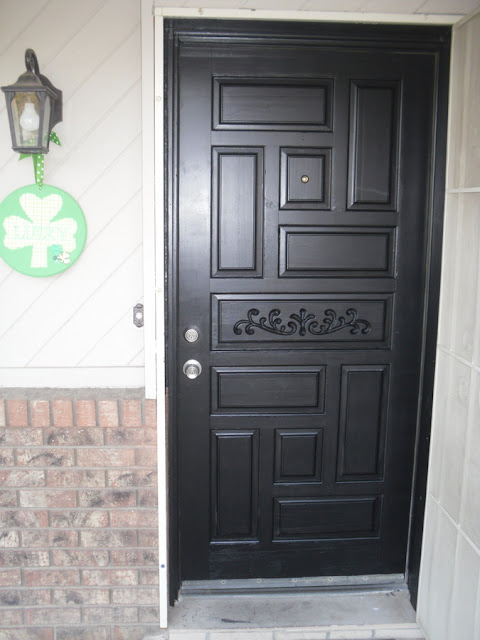
After a couple more coats...
It looks SO MUCH better!!!

Can't wait to hang a cute SPRING WREATH on the front!!!