Showing posts with label Preschool. Show all posts

Friday, February 11, 2011

Valentine for MOMS

Inspired by this heart I made LAST YEAR for Valentine's Day...

I decided to make a similar craft with my Preschool Kids this week for Valentine Week, to give to their moms! I made them much smaller---more like 6" & cut out a pattern and then traced it onto some scrap bead board I had on hand...
This year I didn't even have to use a hand saw...yay!
I got to use my jigsaw that I got for my birthday this past October...
After I cut them out, I drilled 2 holes in them...
And then sanded them down!

Then I let my preschoolers PAINT THEM...pink or red! And then they sprinkled glitter on, while the paint was still wet...
Letting them dry...
Then we added some Valentine Ribbon, so they could hang them up & the kids were SO EXCITED to give them to their MOMS!!!


Photobucket

Thursday, February 10, 2011

Valentine BUCKETS


I picked up these buckets at the Dollar Store for my preschoolers to collect their Valentine's in. 
My husband was laughing & couldn't understand WHY in the WORLD I would get a big black gardening bucket for their Valentines?:)
Well..I admit, they weren't ideal, but I figured I could work with them...
I sponge painted some RED POLKA DOTS onto them & then tied some HEART RIBBON to the handles...
I cut out their names in RED VINYL-CENTURY GOTHIC FONT & they worked out GREAT to collect their Valentine's in at their class party today!!!
I figure the kids can take them home and use them for toys & make them useful, instead of just tossing out the Lunch Bags we have decorated in the past!


Photobucket

Friday, February 4, 2011

"Book Gutters"

I 1st saw the fabulous idea of turning Rain Gutters into Book Shelves at one of my favorite blogs, Stories from A to Z. Check out this CUTE room...


Thanks to my cousin, Joyce, I was directed over to the blog, "MVP's of Mesa Town" this week & guess what I found!?!

A different look, still using RAIN GUTTERS as book shelves!
Hop on over to her blog and check out the BEFORE & AFTER of this reading nook...I LOVE IT!!!
I LOVE THIS IDEA & want to adapt it in my Preschool/Playroom...
very soon!!!


Photobucket

Monday, October 25, 2010

Halloween Craft for KIDS

A FUN & EASY craft I did with my preschool kids today!
They thought it was so cool that they got to "paint" with their hands and feet
AND
it is a perfect keepsake for their parents, to show off the size of their hands and feet at this age!


Photobucket

Tuesday, August 31, 2010

Preschool Prep


A cool feature on Make The Cut (for your Cricut) 
NEW UPDATE: This program is not compatible with Cricut:( I'm so sad!!! But can be used with your silhouette or gazelle & can be purchased through the link on my sidebar! is that you can lay out different fonts & sizes of lettering & then CUT all at the same time!


I needed a "Preschool" sign for my wall & cut out these letters on white cardstock...
Then using these frames I got at Goodwill, all for 99cents(ignore the purple one, I didn't use that)...
 I spray painted the frames red & glued the white letters onto black cardstock...
& created a unique PRESCHOOL SIGN for my wall...
 Wanna see this wall when we BOUGHT our house??
You would NEVER know that we drywalled right over that boarded up window & now that wall serves such an important part of my Preschool Classroom...

Happy Craftifying!
"Meet the Teacher" went GREAT today, wish me luck on my 1st day of School TOMORROW!!!


Photobucket

Monday, August 30, 2010

Alphabet Wall


I have been SUPER busy getting ready for PRESCHOOL
(it starts tomorrow!!)
& when I came across this post over at
"A Few of My Favorite Things"
I knew I was adding it to my personal list of my
Favorite Things!

I REALLY REALLY want to copy this idea somewhere in my Preschool Room, 
so I guess I better start collecting letters here & there!
I just LOVE it!


Photobucket

Tuesday, August 24, 2010

FREE Shelf Redo

My mom got this bookshelf from a neighbor & asked if I wanted it...
I will take almost anything for free, 
so of course I took it.

I've been needing a shelf in our playroom to easily access things while I teach preschool & figured this would do the trick!
I unscrewed the back and took it outside & gave it a coat of red spray paint.
I originally was going to cut a piece of beadboard to fit the back, which would have been SO CUTE, 
but I decided a bunch of preschoolers weren't going to care.
Then I painted the shelf white & screwed back on the red back...
and now I have a perfect little spot for all of the supplies I need within an arm's reach. I just threw some stuff on it that I already had, so things might change, but I already love it...
OH...and I scored that CHAIR for FREE too!!!
It is in really good shape & I think I'm going to try to make a slipcover for it.
Anyone have an EASY pattern or tutorial for me??

It is a perfect chair for me to sit in while I teach cute preschoolers :)

Not a bad little corner, when the total cost was $0


Need some vinyl for your home? Laura at "Say it on the Wall" is giving one of my readers a $25 gift certificate!
Enter HERE

Photobucket

Thursday, August 5, 2010

ABC Decor

I teach Preschool out of my home & since we are WEEKS away from the 1st day of school, I decided it is PAST time to get working on a few projects I wanted to get done this summer...and have put off until now;)

I made this little ABC decor to fill a blank spot on my preschool wall, using ONLY what I had around the house...
Here is a little HOW TO, just for YOU!!!

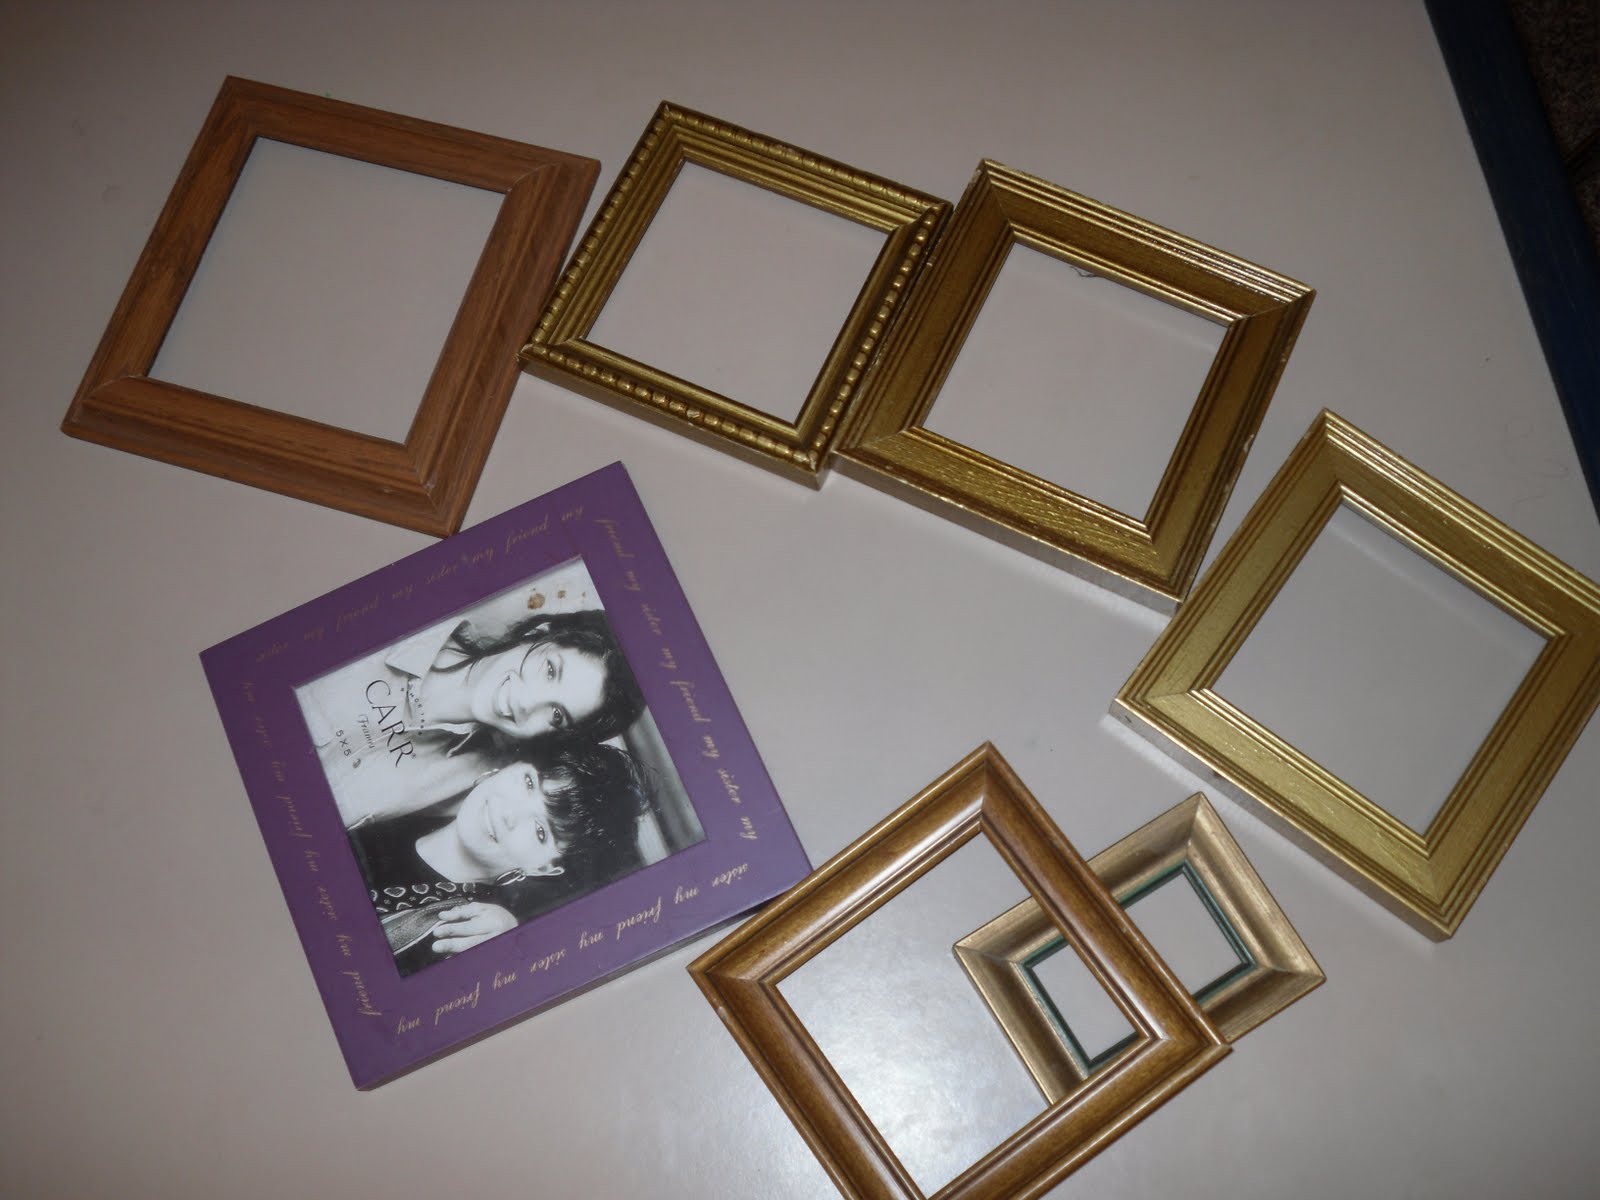
I had these Good Will finds sitting in bags in my home for far too long, so I decided to pull them out & Craftify them!

One Window Box Frame & several small frames...
oh the possibilities! This window frame was 99 cents & the 6 small frames were in a bag, all for 99 cents!
I toyed with several possibilities, starting with the idea to hang starfish in the center of the frames with fishing wire(which I still may do in the future), but for now, I REALLY needed to fill this space in my preschool room!
You see, I push pinned this point chart up on my wall last year, but I have since moved my
"point system" to individual folders & needed to put something in it's place
BEFORE "Meet The Teacher"!

I took the 3 small frames outside for coat of RED spray paint...
and gave the Window Box a new coat of WHITE...
Then I measured and cut squares from a piece of Mat Board.
You could also use WOOD...but
 I had mat board & no wood. 
Easy decision.
Cut those pieces with Scissors!
Much easier than the saw it would have taken to cut wood...
Coated the 3 squares with a coat of Black Chalkboard Spray Paint...
After all the pieces dry, I brought them inside so I could stop melting in the 110 degree weather!
 
Time to "prep" your chalkboards.
Just lay your chalk on its side & cover entire area...
now wipe clean & write a fun saying or in my case, I wrote "A...B...C"...
Now put your mat boards in the frames, securing them with a dot of glue on each side...
Next, I decided how I wanted to hang them.  
 I decided that Ric Rac would be fun in my Preschool Room
& I simply attached it to the back with a stapler...
Once the Ric Rac was attached, it was time to attach them to the window box...
More Staples on top of the inside of the window box frame...
Decided that I didn't like how they hung a bit crooked.
Read: remember that I am slightly OCD...
and hung the small frames directly to the wall instead & then hung the window box around them...

Much better!
There are SO MANY projects you can do with the stuff laying around your house! 
I know this well, because I USUALLY start a project during my son's nap time, which means I CAN'T leave even if I need something, so I've learned to make do with what I have!


Photobucket