Showing posts with label Tutorial. Show all posts

Wednesday, February 1, 2012

String Art

Have you seen this string art floating around pinterest??
My friend is redoing her master bedroom and we were trying to come up with something cute for above her bed.  She showed me this picture and I got to work! You can go to Que Linda for her tutorial, because I just followed that and she explains everything great!  I ran to Lowe's and found this wood with grooves so they fit together and thought that I would like the look and it might help hold everything together...I poured wood glue in the grooves and stuck them together and gave the a LIGHT COAT of white paint...

the only difference from her tutorial, I "free handed" the word, because I didn't feel like busting out my Cricut. You can tell I obviously just chicken scratched until I liked it:)


Then I cut it out, trying to keep the thickness the same for all of the letters. Then I started nailing and when I was done, I pulled the paper off and was left with a bunch of nails!
(my little helper's hands finishing his cereal in the background;)
I went to the store to buy yarn and then opted for crochet thread, since it was thinner. I'm glad I did, because I like the end result better. 

I secured the back by nailing 2 vertical boards  onto my original 4 planks of wood and hung a wire across the back...

It wasn't too hard and I'm excited to see it hanging above Mandy's bed!
If you try it, let me know! I'd love to post it on my blog!

Thursday, June 16, 2011

Landee Do...Staci Copy


Go snatch this free printable over at Landee See, Landee Do.
It is an ADORABLE & EASY PEASY decoration!

I whipped mine out in about 10 minutes, including drying time on some frames I spray painted white.
(You might need more time if it isn't 105 degrees outside...)
and if you already have a frame, then it will take about 1 minute to push PRINT on your computer!

I've had these frames sitting in my closet since I think my wedding & it was time to put them to use...
a quick coat of white spray paint. I honestly think they were completely dry when I stopped spraying.
It is HOT today.
 While drying, I printed out Landee's free printable, I decided to do 2, since we are having a family auction next week at our Family Reunion & thought this would be a cute thing to donate!
 All done!!!
 THANKS Landee!!!

Wednesday, June 15, 2011

You are my SUNSHINE


I LOVE the song "You are my sunshine" & sing it to my kids often. My 4 year old used to make me sing it over & over & over whenever we were driving in the car.
  Both of my boys still love the song & I'm sure I will sing it to our new baby very soon!

From the minute I started seeing the lyrics pop up all over blogland, I knew I wanted to make something with the lyrics for our baby boy's nursery!


 Cellar Designs created this beautiful piece of art...


Love this one in a frame...

Oh, how about this one! I might need it for MY bedroom!

And there are SO MANY MORE, you can just search on Etsy or Pinterest & you will fall in LOVE.

I used Cellar Designs as my inspiration & then went to dig around for a piece of wood in the shed...
I found this cupboard door & decided it was the perfect size & loved how it would give it a "framed look"...
 It got a coat of light blue paint & then while it dried, I got on the computer & "designed" my wording how I wanted. I must have tried 30 different fonts & guess what I settled on?
Times New Roman.
I just liked the simplicity of it.
My cricut can cut 2 feet x 1 foot & this happened to be the exact size of the inner part of the cupboard door!
I think I did it about 11 inches x 22 inches, so I was able to cut it all at once!
 I cut it out of vinyl & then weeded out all of the letters, leaving a "stencil" that I then applied to the wood...
 then I took my brush and painted all of the "sunshines" with a pale yellow & the rest of the lyrics with white...
 after it dried, I pulled up the vinyl, leaving freshly painted letters & lightly sanded over the words & the edges of the door...
 I actually made that one to donate to an auction next week & chose to paint the one for the nursery all RED, since I'm working to bring more red in that room. Here they are, all finished!
I hung the red one in the nursery, but now I'm debating painting the "frame" part of the cupboard red so that it pops off the blue walls a bit more, 
but we will see...
The other one is not quite as bold, which will hopefully allow it to match someone else's decor easier, 
since it is being auctioned off at a family reunion...
the nursery is coming along!
Here is a sneak peak at one corner...
1. Used my same Brown, Tan & Blue Crib Bumper & Sheet that I had with my other boys
2. Made the Scalloped Blanket that I had been wanting to try!
3. Made a simple pendant banner for above his bed & will iron on his name in RED MATERIAL soon...we actually CHOSE A NAME!
4. Found red curtains on clearance last week at Walmart for $6
5.Covered his changing table in the same Dinosaur fabric that I made his scalloped blanket out of
6. The curtains came with red ties that I repurposed & sewed one around a pillow with a button in the center to make it a bit cuter!
7. And last but not least, hung his "Sunshine" board in the corner
All ready for our baby boy to arrive in a few weeks!!!


Monday, June 13, 2011

A Blanky for a Fireman's Grandson

I picked up this black minky fabric when I went to the LA Fashion District in January for REALLY CHEAP & I decided it was time to do something with it.
I have had this fire dog fabric for years & since my father-in-law is a fireman, we love firemen EVEN MORE than the typical boy in our family!!!

I decided this baby boy in my tummy needed another blanket to love & cuddle, so I sewed this up for him...
Nothing fancy, just laid them together, cut them to the size I wanted using another baby blanket as a template, pinned & sewed a straight line all the way around. Then I turned the black over on to the top, tucked under the raw edge & sewed a straight line again. The corners got a little bulky but I figure it will just make them more durable, since my children seem to love to chew on the corners of their blankets! :)
I need a blanket made out of this material, 
it is soooo soft.
The only problem? 
This 2 year old thinks the blanket is his ;)

Friday, June 10, 2011

Bedroom Lamp Redo

These 2 little ladies have been sitting on our nightstands for the past several years & it was time to give them a makeover...
They are BROWN & nothing in our bedroom is brown. 
I thought I was going to buy some new chunky blue or yellow lamps for our room...but lets me honest, 
these 2 lamps are FREE...so for now, they are staying!
I snipped off the jewel thingy-s that hung down. Mostly so I didn't have to spray paint around them.
Then I chose a new color for my lamps...BLUE!
Gave them a quick coat...
and while they dried, I went inside to revamp the shades.
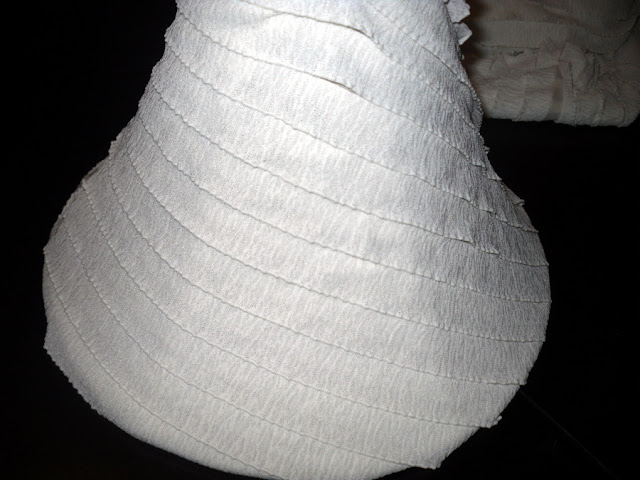
I was going to leave the shades, but remembered I had this pre-ruffled fabric in my stash & thought it might be cute on the shades...
and so I wrapped them, in no particular way, hot gluing along the way!
Put the lamps back together...
oh yah, I sanded down the bases first...
and then put them back in their places...
and they coordinate MUCH BETTER in our bedroom...
so I'm happy! :)

Wednesday, June 8, 2011

Wedding Onsie

My brother is getting MARRIED!!!
and might I remind you, that his wedding date is 2 days before my due date. 

HOPEFULLY I won't be in labor on his wedding day & I will be able to attend. 
But, the chances of having the baby a week or 2 early are good
(since both my boys have been early)
SOOO...I'm going to assume that I will be at the wedding with a BRAND NEW BABE!

AND he must be just as stylish as the rest of the grandsons with their PLUM ties, 
so I grabbed some fabric & a onsie & went to work...

I chose the EASY route & just used pinking shears to cute out a tie outline & then straight stitched it right onto the onsie...
I think this project took 10 minutes start to finish & now...my little newbie will coordinate with my 2 year old, 4 year old & their daddy!
I can't believe it is going to be ME & FOUR BOYS in our house soon!!!

Wish me LUCK;)

Tuesday, June 7, 2011

Rustic Cabin Clock

We planned a trip up to my in-laws cabin a couple weeks ago & I wanted to surprise them with something nice for the cabin. 
I decided to make a large clock to hang on their fireplace
& wanted it to have a "RUSTIC-CABIN FEEL".

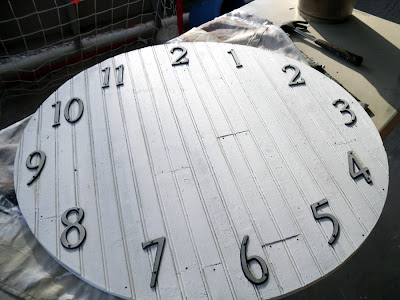
I started with a 3 foot round piece of wood...
and some tongue & groove wooden planks...
I just started lining them up on the round...making some simple cuts with my jigsaw every now and then to break up the planks...

and kept going until my round was completely covered...
Then I just used some wood glue to attach the planks where I wanted them...
Once it was dry, I flipped it over & cut off the "extra wood"with my jig saw using the circle as my guide...It was SUPER EASY!
I gave it a sloppy coat of white paint. Remember, I wanted a RUSTIC look, so I didn't want it to look to even, but I wanted it all white...

I was going to paint the numbers on, but decided to give the ever famous "address numbers" a whirl, to give a 3D look...
I nailed them all on & nailed several nails throughout the clock to hold the planks on securely & to add to the rustic look...
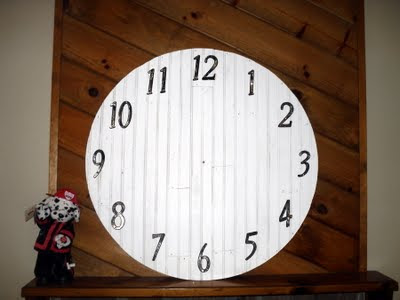
They had a kind of reflective silvery look which I thought might look like metal, but I ended up not liking them & painted the numbers solid black.

I finished the project up at the cabin, during our getaway & discovered the mechanism I brought up DID NOT WORK!!! I was sad that I couldn't attach the hands & hang it up for them on this trip:(

BUT...this is where I PLANNED to hang it...

Maybe after the baby is born we will get up there with the FINISHED CLOCK...
Now...should I remove the ADDRESS NUMBERS & paint on some numbers & sand them down for a weathered look??? Every time I look at it, I feel like I'm looking at a house address...but maybe I have just been looking at it too long?? Thoughts???